Pot Holders
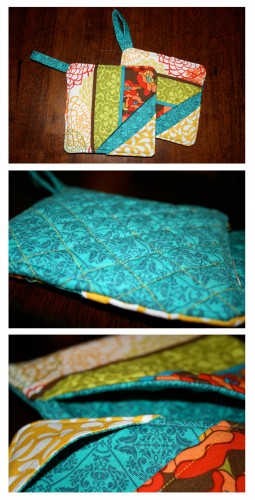
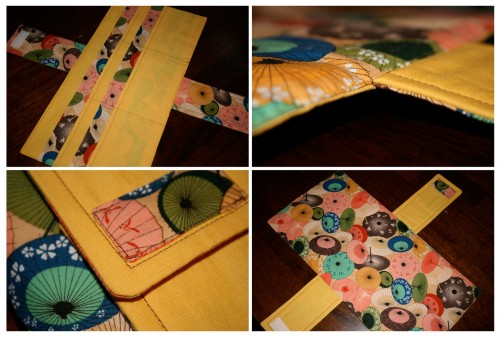
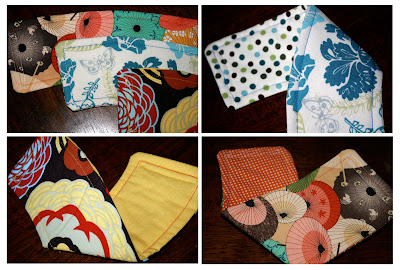
These potholders were a birthday present for my mom. I made them over a month ago before school started and was just waiting until after her birthday to post this.
This was a tough project. I looked for some patterns online and didn’t find anything I liked, as usual. So I just decided to wing it. I always see pot holders that are square shaped and have the opening for your hand, but I hate those because they fall off when you use them… and that’s not really safe, now is it? So I thought about it for some time and decided to make the hand opening on an angle so that I could make a little thumb opening too. I also wanted to make them small enough to fit my hand (and my mom’s, I’m guessing her hands are the same size as mine) because I really also hate that pot holders are so big and clumsy… because that’s not safe either. Anyway, so they are small at about 6″x6″. They are also filled with Insul-Brite batting to make them heat resistant. Two pieces of batting in the bottom layer and one on the top layer, made it SUPER hard for me to sew. I’ve never sewn anything that thick and fluffy before, so that was a huge challenge for me. But I did it. And I also quilted the bottom layer which was also a first for me.
Here is the final result!
Pencil Case
It has been so long since I sewed!!!! Ok, maybe not that long, but it feels like forever! I was so happy to procrastinate today by sewing while putting off all of my school work (whoops!).
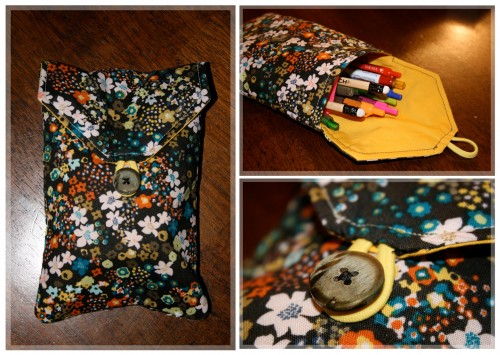
Ok, so I’m the jerk who rummages through my bag in the middle of the quiet classroom, looking for that pink pen, because all my classes are color coded. I really lost that pink pen last week and it was driving me nuts. I finally decided it was time to make myself a pencil case! And yes, I do use lots of pencils too. And no, I don’t use mechanical pencils, I dig the real deal… mini pencil sharpener and all.
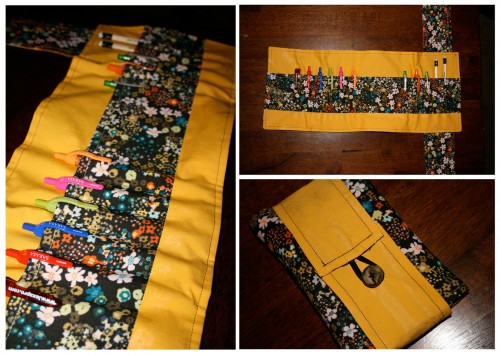
I didn’t have any zippers, nor have I ever sewn in a zipper, so I’m a bit scared of them.. So I decided to come up with another idea. Originally I wanted to create a rolling pencil case like the wallet I made a few months ago, and the CD case I made. So I made that first. It didn’t turn out the way I wanted it to turn out, as I did not use any batting (I don’t know what I was thinking) and it just didn’t work for me. But I still love it and think I may redo it and maybe make Jen her pencil case she’s been wanting. The design might not work for her, but we can figure it out when I get to see her 2 weeks from now for Kara’s bach party and shower. (yay!) So anyway, I just decided to go for a simpler bag idea for my case. This one is nice and simple and I like it because I can toss in my sharpener too. My sister gets the credit on this design idea, because I was frustrated and complaining to her on the phone about it and she suggested I make something like my glasses case, but bigger. I love this fabric soooooo darn much too! It also matches my little planner nicely too, so I like that too :o)
Here it is, and as you can see, I found my lost pink pen:
Here is the other one I made.. I really do love it, but I just really screwed it up by not using any batting. It will be redone eventually. Ignore the marks on the fabric- I use a glue stick to hold my fabrics together when I sew, instead of pins… I like it better. All the glue comes off in the wash afterward, and I was planning on washing this after making it.. but I didn’t because I wasn’t going to use it.
This was fun! Hopefully I will get to sew again soon. I will have another update next week when I finally get to post the gift I made my mom for her birthday (which is the 23rd). So that will be up once I give it to her!
Kate’s Clutch
Here is yet another (and my favorite to date) clutch purse… Made for Kate as a birthday present from Jon. Happy Birthday Kate!
This is fully reversible with an invisible magnetic clasp.
Baby Bibs!!
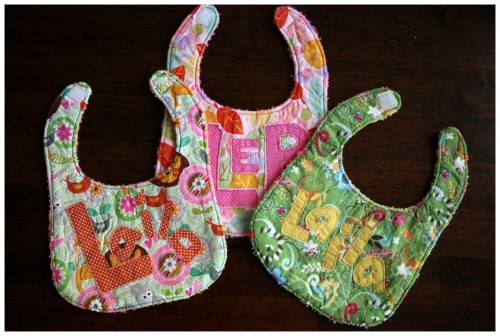
FINALLY! I have been waiting to make these bibs for a few months now. I knew I wanted to make Henna and Ian’s baby something and decided on bibs, but had to wait until they had “the nug” so I knew if it was a girl or a boy. I originally wanted to make the bibs unisex so I was going to make them early anyway, and then I thought it would be really nice to make them personalized with the baby’s name on it. So finally, a beautiful little girl arrived on March 2nd. Congratulations to the luckiest parents, Ian and Henna, and the luckiest baby in the world, Laila Elise Pryor. I’m so glad you loved these bibs!
Here are some pictures, click on them to enlarge.
Tissue Box Cover
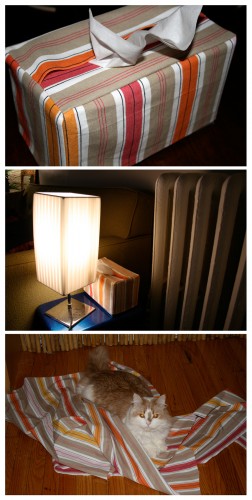
Ok, I know, I know, this is a total Grandma project, but whatever. I have a ton of other projects to get to but I’m waiting for myself to get motivated to leave my parking spot to buy new fabrics and other things I need, but that is tough because it takes me an hour to find parking by my apartment.
I have promised a lot of people that I will make them this, that, or the other thing, and I apologize for the delay. In the meantime, I’m playing around with the fabrics I still have and just trying out new stupid things.
I hadn’t really sat down to sew for a few days (sorry for the 4 posts in one day, btw) but since I wanted to, I decided to try something that would allow me to use some of the old fabric I’ve been ignoring and to help me practice sewing a cube shape, for when I want to make bags. It’s actually not very easy because there seems to be a lot of guessing going on (like- “I can’t see what I’m sewing but let’s just have Coco cross her paws for me that it works out”) and I hate guessing, because then I can’t easily re-create anything. For some reason, I tend to get lucky when I guess things like that though- but that’s why I’m only good at things on the first try and then never again.
This cover is fine, I kind of hate it, but its better than a stupid box. I tried ironing the fabric like a hundred times, but the wrinkles weren’t coming out because it is a canvas-like fabric. However, Coco definitely seemed to enjoy it more than I did. At one point she was actually sticking her paw into the sewing machine (It was not running at the time) to try and play with the string that was running through the needle. Of course I immediately removed her, lowered the needle into the machine, and turned it off… you can never be too careful with a kitty like her- she will get into everything! Crazy cat.
Kara’s Birthday Clutch
This was the purse I made Kara for her birthday. I wasn’t too happy with the buttons, but it is a real pain to hand sew on each button and make them perfectly in place.. I guess I wouldn’t know though because I did not even come close to the buttons being equidistant! However, this purse was actually the first one I’ve made that was completely seamless on the inside. In the last ones I made the top flap as a separate piece, but with this one I figured out how to not have that seam in the middle. I love that!
CD/DVD Case
It’s amazing how with each project I feel a stronger sense of pride in my work.. they just keep getting better! Maybe not the actual item, but for me the process becomes much more exciting, the perfection begins to feel crucial, and after spending 6 hours on it (which actually only feels like 2), the end result is the second best feeling from beginning to end. The first, however, is giving it away and seeing the appreciation on a friend’s face. I can only hope it doesn’t sit in a drawer collecting dust for the next 10 years. That’s why I try and make things that are useful. Structure is nothing without function.
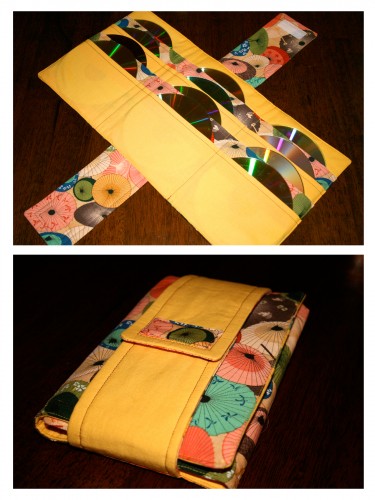
My friend Laura and I went on a Target excursion recently, and one of the things she needed was a cd case for her P90X dvd’s. She didn’t find one that day. So a few days ago when I was trying to think of new projects to create, I immediately thought of her and the case. So I found out there are 12 dvd’s in the set and I started planning a design for these. I knew I wanted it to be compact, foldable, and closable. I googled around for some tutorials and/or pictures for ideas, but there was nothing! The only ones I saw tutorials for were those car visor cd cases, so it was time for me to think about it and come up with my own design. I stuck with the same simple idea of the rolling wallet I made awhile back, but just added layers and straps and measured out for the cd’s.
I actually made one first that turned out to be a huge fail. But I took it with me to her place last night and showed it to her and she loved it, so it was definitely worth a second try. The second one (pictured here) turned out perfecto-mundo. If cd’s were still popular, this would be a little more useful… oh well. I guess we do still have dvd’s.
By the way, I should mention… Laura, my favorite bartering and kitty cat friend, is the lovely lady who bought me my amazing Olfa self-healing mat and gave me her rotary cutter. I can’t thank her enough for those things, they are what makes all of this possible and what puts a huge smile on my face every single day. Thanks, Laura!!
Tissue Pack Cover
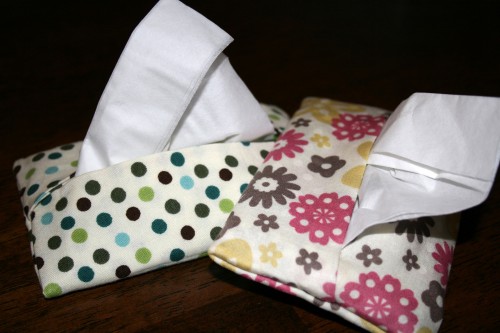
What on Earth did I ever do without these?! First of all, they are the easiest things in the world to make. Secondly, they are super duper uber cute and I will be making lots of them.
Tutorial can be found HERE but tweaking is necessary for the size of the tissue pack. I guess most of them are a standard size, but I have about a gazillion pharmaceutical ones that were given to my parents by reps, and their sizing is way different than the standard. So be sure to check!
Reversible Clutch
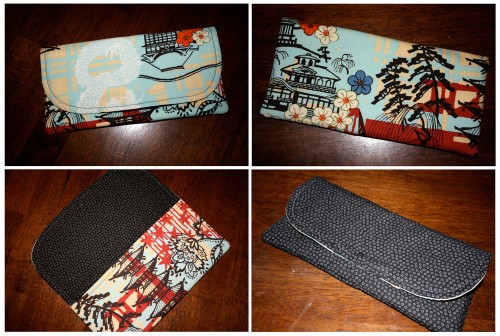
I know everyone is probably really sick of seeing all the same prints, but this one is still my favorite! I loved the clutch I made Mitzi and wanted to make one that was reversible. At the time, I didn’t know how to do that, but I have since learned! It’s a bit tough, but worth it in the end.
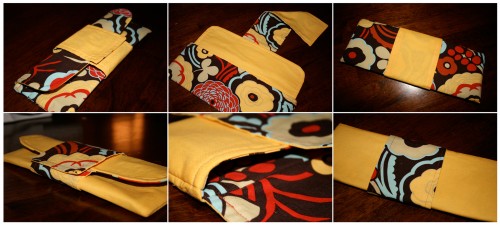
Since I don’t have too many good clasp/button options laying around at the moment, I thought about other ways to close the purse. I decided to design this little wrap element which I really love! The best way to keep that working for both sides is to sew magnets into the fabric of the strap, that way it stays functional when reversed. I didn’t have magnets but was itching to sew out my design, so thought I’d just make it anyway. Here is the finished product! The first two images on the left are of the front sides, and the last two on the right are of the back sides. The middle pics show you what it looks like open and some stitching close up. Remember you can click the image to enlarge!
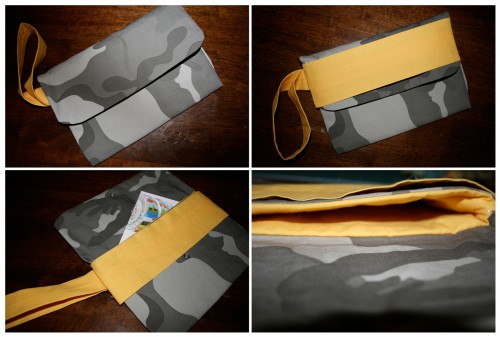
And just because I think it’s funny looking, I will post what I made last night. Originally before deciding on the wrap around clasp, I thought it would look cool to make a wristlet with a strap across it to tuck the top into. Once I completed the project, I realized it looked like a Teenage Mutant Ninja Turtle. Either that or a blindfolded soldier. I’m not sure how anyone could possibly make a wristlet that looks like a ninja turtle, but somehow I did. If any girls are planning to be a TMNJ for Halloween this year, let me know.. you will have a purse to take along!
I attempted to see what it would look like without the top tucked in, and I think that looks better. Regardless, I will probably not be using this wristlet. It was poorly made, and stupid, however it was definitely good practice for tonights clutch which I think turned out really well.
Eyeglass Case
Ok, so I am fully aware of the fact that I need to buy new fabric. These are getting old, but they are cute enough for practicing new things just in case something happens to unexpectedly turn out awesome. This eyeglass case, however, did not. This was a huge pain in the butt to make because I was following a tutorial for a basic reversible case (without a flap and without batting) and it was just impossible for my brain to understand the logistics of some of the things I wanted to do. I could have just done the same thing I did with the clutch, but I wasn’t happy with the stitching of that. In addition, I wanted to add a flap top which I had to make beforehand, size to the width I guessed the case would be after glasses in it, and incorporate it into the sewing of the case. I think that’s the hardest part about sewing, you often need to be logic-minded and a good problem solver to figure things out on your own or to create new things. It’s tough, but that’s my favorite part about it. Even though I get frustrated sitting there looking at the 4 pieces of fabric and batting on my lap, after about 20 minutes of staring at it with high blood pressure, I calm myself down and decide to actually solve it. It’s fun. I like puzzles. For some reason, even though I can follow directions for something complicated (or rather, complicated for me but probably not for the rest of the world), it is still not enough brainwork for me and I always feel the need to add something else to it. In this case it was the flap top and the hand stitched flower cut out with the other fabric peeking through. I also want to thank Jen for the cute wrap button idea. I didn’t have any good string for it, but I had this laying around the house, so I used that.
Don’t ask me to make you one. Please, I’m begging you!
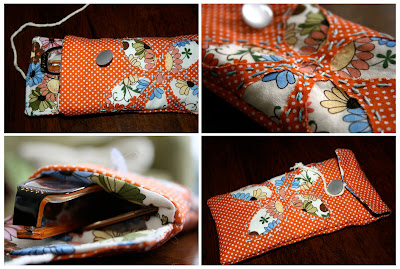
Oh and FYI, you can click on the picture to make it bigger and see it close up, as you can with all the pictures in this blog.
New Roll Wallet
My original roll wallet was a huge hit, but it was so poorly made. I’ve been thinking about it a lot and trying to come up with a design that is simple to make, yet still provides different sized pockets. In the first one, I created some really complicated pocket levels that I just couldn’t recreate. I’d like to be able to make a few without it taking me a hundred years, so this was the best option, and I actually like it better. I still need to work on sizing the pocket widths appropriately, but that should be an easy tweak. I would love feedback on this one, and would like to know what everyone would keep in this thing so I can get a better idea of what to size the pockets for.
New Card Holder
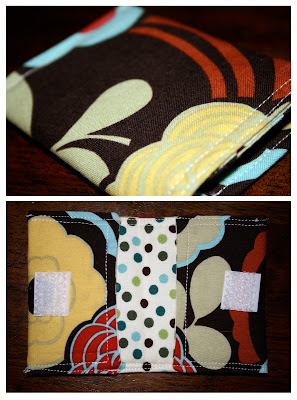
Ok, I’m still working on making this one… I’m not sure why it’s so tough for me, it seems like it should be super easy. My stitching is slightly better I guess, however I did get lazy and decide to just use the white thread I was already using. It would look much better in a different color. I made this one too small and couldn’t fit even one card in it.. but I thought I’d post it anyway. You get the point.
Camera Strap Cover
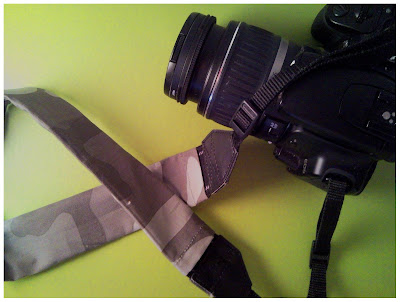
I got this idea from an old Design*Sponge post and just loved it. It just jazzes up your camera strap, making it look better and covering up the huge CANON CANON CANON across it. I probably should have used some pretty fabric but originally made it with this camo fabric and just got lazy in making more. I also have been using the same fabrics over and over again, so this works for me. Besides, I do love me some camo… I’ve been hooked on camo since 9th grade thanks to Val Moniz. :o)
Clutch
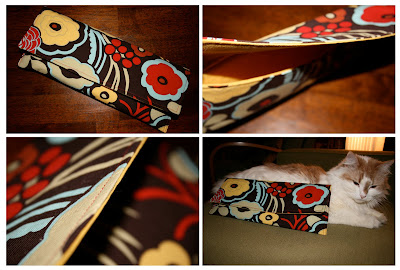
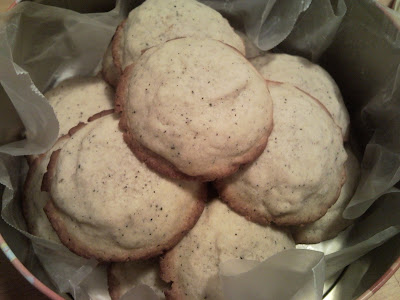
Mitzi & Jeff’s bridal shower had a really cute spice and recipe theme. We were all asked to bring a spice and a recipe with us to help start their collection. I, of course, never do anything the right way. I couldn’t think of the perfect spice or recipe but then decided on my Chai Tea Cookies. Mitzi and I lovingly refer to each other as our “Cookie” so it was appropriate. My spice was chai tea (which would be a conglomerate of spices) and I chose to package some of my favorite chai tea bags from the indian store that I always make my mom buy for me! I also included a baggie of crystallized ginger and my recipe for the cookies. I thought for awhile about how to package this gift, and originally thought I would make two little pouches and them put them in a box. Then I decided to make one big one so she could reuse it as a purse/clutch. So here is my finished product. I really love it and can’t wait to make more. Since I am horrible at cutting straight lines without that ruler board thing I need to purchase, I accidentally made it a little wider on one end than the other. When I was figuring out how to sew the last portion, I decided to keep the edges straight which would allow the clutch to have more room inside for stuff (and would potentially allow the top flat to fold over a bit easier once the bag is filled) So that worked out pretty well I think. I didn’t attach any buttons, however next time I make one I should probably use one of those magnetic snaps. Here’s the clutch! It’s a simple design that could probably use some tweaking in the future, but I still like it. Probably my best project to date! It’s exactly 12 inches (1 ft) in length- I took a picture with Coco so you could gauge the size of it.
Cocktail Napkins
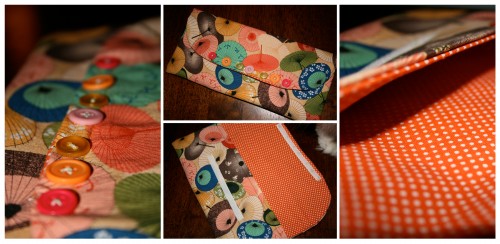
I wanted to make something for Mitzi and Jeff for their bridal shower and was having a hard time deciding on something. Jen gave me the idea to make cocktail napkins! I had no idea people used cloth cocktail napkins, I’d never seen them before. But I looked them up and they exist. Jen is also a soon to be interior designer and avid entertainer, so I can always trust her ideas. The cocktail napkins made a fitting gift in addition to some beautiful martini glasses off their registry. It was also a nice idea because I did not have to worry about it matching anything they own. I absolutely loved the fabric I found for them, and thought it paired well with the orange polka dot fabric. They were easy to make, just a bit time consuming. I really need to find a good way to cut my fabric straight, maybe I need to research sewing tools and equipment, because that definitely would be a huge help if I could cut pieces that were all the same width and length. Here are the pics!
Coffee Cozy
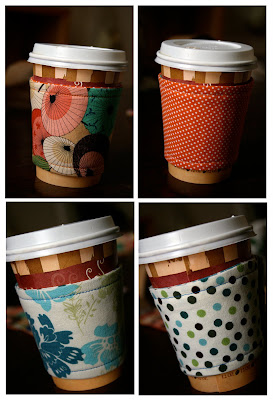
I just love these little coffee cozies and can’t wait to make more as gifts! With this project, I finally got to use and understand how batting works. I pre-washed all my new fabric that I bought the other day, however I didn’t wash the cozies after I made them, so I’m not yet sure how the batting will shrink if washed. I’ve also finally discovered the logistics to making things the right way so that all stitching and foldings are clean and neat. This takes A LOT of ironing work, btw.
Here are the coffee cozies… They are reversible with velcro attachment. I loved the yellow/red fabric one, but I made that one too small so I don’t have a pic of it around a cup.
On another note, my friend Dave bought me the domain name for my website and we are working on setting it up. So eventually I will move my blog to that site. I’ve also already registered my shop at Etsy so eventually if I want to sell, I’ve saved Sew Knot Kneaded on there, however I have found that sewing is extremely time consuming so I’m not sure I’ll be able to make very much once school starts. We shall see.
Shopping Organizer
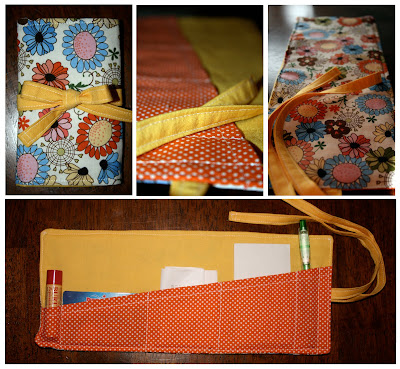
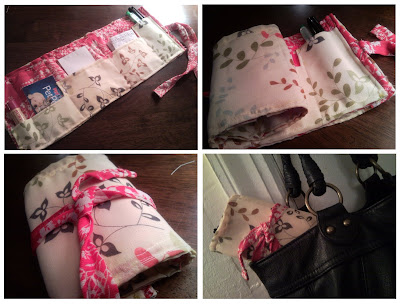
I got this idea from some of those rolled paintbrush holders, and I believe make-up brushes come in the same type of design. This little organizer is poorly made but has a good design element to it. I have since discovered the proper way to make many of these things that I made a few weeks ago, so as horrible as this is, it will get better, I promise.
Anyway, this can hold a chapstick (of course- we girls always need a chapstick with us), those store discount cards that just fatten your usual wallet, a small notebook, important receipts, coupons, and other little notes, and of course a few pens! It rolls closed, so you can still grab your pens (and chapstick!) without opening the whole thing.. and you can just toss it in your bag, and it takes up just as much room as a normal wallet.
I will eventually be perfecting this idea, making sure my stitching and basic design is clean and sturdy.
I have a few new projects I’ve made lately but were made as gifts so I will have to post once the gifts have been given!
A Few December Projects
I finished all of my nursing pre-reqs somewhere towards the end of December and decided that in my 3 months off, I would work on all sorts of creative projects. I feared that once I am a nurse I will push the creativity out of my life and I wanted to immerse myself in it for a few months just to ensure that I would establish it as a part of my life forever.
As a kid, I loved to do anything artistic. I painted, I took pottery classes, anything and everything. My mom is an amazing artist and I wanted to be just like her. I had been taking art classes in school for as long as I can remember and then continued on to major in it in college. So for all these years, art has been somewhat of a chore… I mean, it was homework. It was always homework. So when I lost my job last August, I chose a new path for myself. It was a tough decision to make, but my best friend Tracy (plug: link to her photo blog to your right) put it to me simply… She asked me if I wanted to keep this interest I have in diseases (I always loved to research pathology) as a hobby or make it my career, or keep creative as my career or make it my hobby. It seemed so obvious to me after that. So here I am going back to school to be a nurse and eventually a nurse practitioner, and currently sitting here creating my first blog post for all my creative hobbies.
My sister got me a sewing machine for Christmas last year (2008), and I didn’t spend too much time figuring it out until the end of the year. So after sewing some minor things like making old halter tops into normal strapped tops, and cinching in some shirts that were too big for me, I decided to sit down and work on some real fun stuff.. little things I could start to make as gifts for friends. Sewing has now become a serious passion. It is probably the most fun thing anyone could ever get involved in! I can’t imagine being without my machine, and absolutely just love sharing my ideas with everyone. Hopefully one day I can get good and start selling things on Etsy.
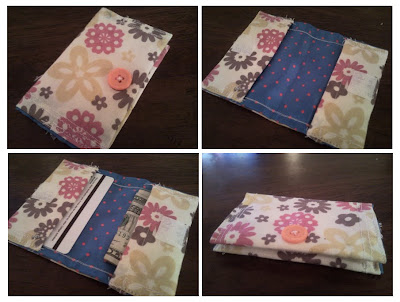
My first project was a little wallet, or card holder. As you can see, my stitching is horrendous, but it was my very first! I have since figured out a much smarter way to make this same wallet. I gave this one to my sister for Christmas. Sorry for the poor quality photos, they were taken with my cell phone.
About a week before Christmas, I attempted to have a Christmas Cookie Baking Party, however a huge snowstorm came and dumped 2 ft of snow on us, so only one person made it. Anyway, it was the first time I ever made cookies from scratch, and I was surprised at how well they turned out! So I continued to make cookies for the next few weeks and for Christmas I invented Chai Tea Cookies with Crystallized Ginger.
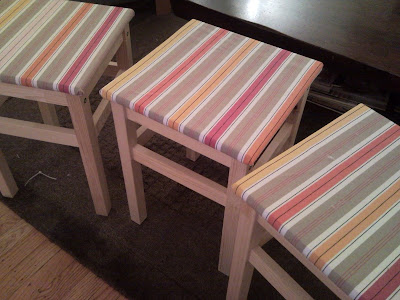
Before having people over (which never happened) I wanted to get some stuff together in my apt. One of the things I had been meaning to do was to run out to ikea and buy these little $10 wooden stools that I could line up by the coat closet to look like a bench, but there would be three separate ones so that they can be used as extra seating as well. Well I bought them and decided to cover the seat portion of it with some striped fabric also from ikea. I love the way they turned out. They are cute and cheap, and just add a little something extra to my living room.
And who doesn’t love wrapping gifts?! I love it, and on Christmas Eve, I was bored at Mom & Dad’s and they asked me to wrap their gift to Nate, so here is what I came up with… I thoroughly enjoyed making a faux bow and adding his name to the gift as well.

Once again I apologize for the poor quality photos, I was using my cell phone to take these pictures because I never intended to put them up on a blog. From now on I will be using my DSLR as much as I possibly can (except for the next few posts!)
I hope you enjoy my new blog! Constructive criticism is always welcome!!

