Latest

New Header

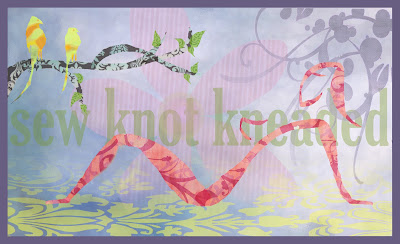
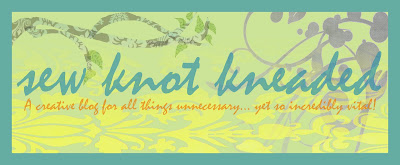
Ok, so I really loved the old blog header, but it was a premade one and I wanted my own. So, I designed these headers myself with a little photoshop fun. I had originally made the larger one with a lot more going on based on a painting I did in my living room, but decided to simplify it… if you could even consider it simplified. However, I am still looking for a 3-column layout that will allow me to use my header. If anyone has any suggestions as to where I can find these, please let me know!! I’ve been googling and downloading all kinds and trying them out, but nothing seems to work. I even tried a 3-column blogger minima (that looked just like this 2 column one), but for some reason it wouldn’t let me upload my header.

Anyway, here is my original:

And here is the new one:

I would love input on my headers! Should I simplify it even more? Should I change any colors? Is it just plain ugly? Let me know! I love constructive criticism!

UPDATE: Jon said he likes the colors of the original but the layout and font of the new one… so here is what I came up with:

But I’m still looking for more feedback!! Tell me what you think. Thanks!

Lemon Bars

I think maybe snow days were invented for the sheer purpose of baking. I found the most delicious recipe for lemon bars and decided to try them on a snowy blizzardy day like today. My mom used to make us lemon bars growing up, but they were always from a box.. I can’t remember the brand name but they were super delicious. Then they stopped making them and in college when I wanted some, I had to resort to a different brand name which tasted like Lysol. So this is the first time I’ve made them from scratch, and they are so much better than any other lemon bars I’ve ever tasted. Amazing.

Recipe can be found here: http://allrecipes.com/Recipe/Lemon-Square-Bars/Detail.aspx
Definitely worth trying!!

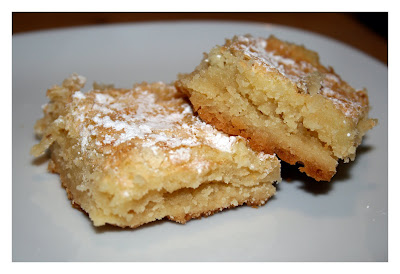
Here are my pics of the lemon bars (aka: deliciousness) I made this evening:

I have to say, these actually tasted better than they look!! They look like they could be dry, but they really are not, at all!

Broccoli Cheddar & Chicken Crepes

I’ve been making crepes for a little while now and they are just amazing. They are perfect for me because I’m not a bread fan, as I think bread takes away from all the wonderful flavors of what I’m really supposed to be eating. I also get extremely weirded out by eggs and don’t really enjoy omelettes- so this is a perfect medium that is oh so delicious. I found this crepe recipe just after the new year and unintentionally went on a “crepe diet.” I ate nothing but crepes for 2 weeks straight, breakfast, lunch, dinner, and dessert, and lost about 5 lbs! It was really fun to experiment with different fillings and combining unique flavors. The first one I made was an apple cinnamon and sugar crepe topped with some melted vanilla frosting. After that fun creation, I was hooked. I made a mushroom filling using mushrooms and mushroom soup, then I made lemon curd crepes, and some other fun creations. However, my two favorite crepes were the goat cheese and fig jam crepe, and the broccoli cheddar and chicken crepe. This tastes even more delicious than it looks! I just ate this one for lunch after photographing it :o)
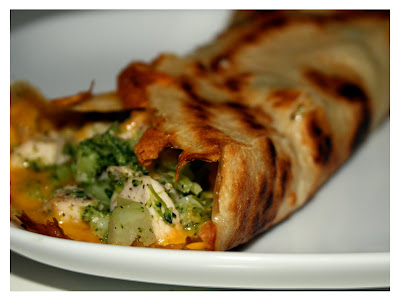
My crepe recipe comes from allrecipes.com, however I have tweaked it a bit by adding vanilla extract. It is so incredibly easy to make and is not unhealthy by any means. This recipe makes approximately 8 crepes.

Basic Crepe Recipe:

Ingredients

1 cup all-purpose flour
2 eggs
1/2 cup milk
1/2 cup water
1/4 teaspoon salt
1 teaspoon vanilla extract
2 tablespoons butter, melted

Directions

1. In a large bowl, whisk together the flour and the eggs. Gradually add in the milk and water, continuing to whisk. Add the salt, vanilla, and butter; whisk until smooth.
2. Spray a frying pan with Pam spray and pour the batter into the pan, using approximately 1/4 cup for each crepe. Tilt the pan with a circular motion so that the batter coats the surface evenly.
Cook on high until the bottom is light brown and can easily slide around in the pan and the top loses it’s shine. If you’d like you can flip and cook the other side, but it is not necessary.
3. Add filling, roll crepe, and slide onto plate.

I have no formal recipe for this filling..
I just use two packets of frozen chopped broccoli and cook as described on back, boiling them in a bit of water.
For the chicken, I buy thin sliced breast and put them on a Pam sprayed roasting pan and rub in sea salt and fresh cracked pepper on both sides. I toss in the oven on 475 for about 8 minutes or so. I slice into small pieces and add to the broccoli and continue to cook both together in the pot on low.
Once my crepe starts to cook in the pan, I shred cheddar cheese over top, and then add a bit of the filling and shred some more cheese over that.
I then roll it and slide it onto the plate- and wa-lah! There you have it. Deliciousness.

Enjoy!
New Roll Wallet

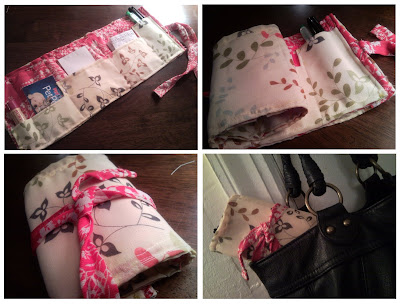
My original roll wallet was a huge hit, but it was so poorly made. I’ve been thinking about it a lot and trying to come up with a design that is simple to make, yet still provides different sized pockets. In the first one, I created some really complicated pocket levels that I just couldn’t recreate. I’d like to be able to make a few without it taking me a hundred years, so this was the best option, and I actually like it better. I still need to work on sizing the pocket widths appropriately, but that should be an easy tweak. I would love feedback on this one, and would like to know what everyone would keep in this thing so I can get a better idea of what to size the pockets for.

New Card Holder

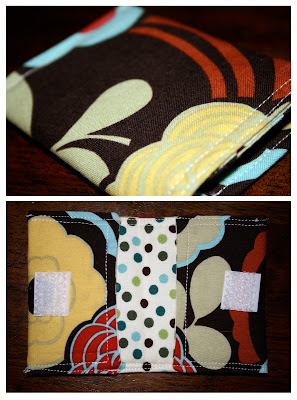
Ok, I’m still working on making this one… I’m not sure why it’s so tough for me, it seems like it should be super easy. My stitching is slightly better I guess, however I did get lazy and decide to just use the white thread I was already using. It would look much better in a different color. I made this one too small and couldn’t fit even one card in it.. but I thought I’d post it anyway. You get the point.

Camera Strap Cover

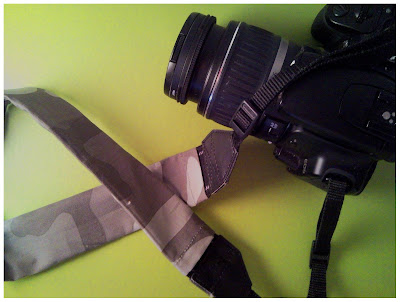
I got this idea from an old Design*Sponge post and just loved it. It just jazzes up your camera strap, making it look better and covering up the huge CANON CANON CANON across it. I probably should have used some pretty fabric but originally made it with this camo fabric and just got lazy in making more. I also have been using the same fabrics over and over again, so this works for me. Besides, I do love me some camo… I’ve been hooked on camo since 9th grade thanks to Val Moniz. :o)

Clutch

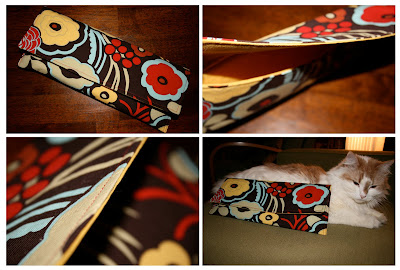
Mitzi & Jeff’s bridal shower had a really cute spice and recipe theme. We were all asked to bring a spice and a recipe with us to help start their collection. I, of course, never do anything the right way. I couldn’t think of the perfect spice or recipe but then decided on my Chai Tea Cookies. Mitzi and I lovingly refer to each other as our “Cookie” so it was appropriate. My spice was chai tea (which would be a conglomerate of spices) and I chose to package some of my favorite chai tea bags from the indian store that I always make my mom buy for me! I also included a baggie of crystallized ginger and my recipe for the cookies. I thought for awhile about how to package this gift, and originally thought I would make two little pouches and them put them in a box. Then I decided to make one big one so she could reuse it as a purse/clutch. So here is my finished product. I really love it and can’t wait to make more. Since I am horrible at cutting straight lines without that ruler board thing I need to purchase, I accidentally made it a little wider on one end than the other. When I was figuring out how to sew the last portion, I decided to keep the edges straight which would allow the clutch to have more room inside for stuff (and would potentially allow the top flat to fold over a bit easier once the bag is filled) So that worked out pretty well I think. I didn’t attach any buttons, however next time I make one I should probably use one of those magnetic snaps. Here’s the clutch! It’s a simple design that could probably use some tweaking in the future, but I still like it. Probably my best project to date! It’s exactly 12 inches (1 ft) in length- I took a picture with Coco so you could gauge the size of it.

Cocktail Napkins

I wanted to make something for Mitzi and Jeff for their bridal shower and was having a hard time deciding on something. Jen gave me the idea to make cocktail napkins! I had no idea people used cloth cocktail napkins, I’d never seen them before. But I looked them up and they exist. Jen is also a soon to be interior designer and avid entertainer, so I can always trust her ideas. The cocktail napkins made a fitting gift in addition to some beautiful martini glasses off their registry. It was also a nice idea because I did not have to worry about it matching anything they own. I absolutely loved the fabric I found for them, and thought it paired well with the orange polka dot fabric. They were easy to make, just a bit time consuming. I really need to find a good way to cut my fabric straight, maybe I need to research sewing tools and equipment, because that definitely would be a huge help if I could cut pieces that were all the same width and length. Here are the pics!

Coffee Cozy

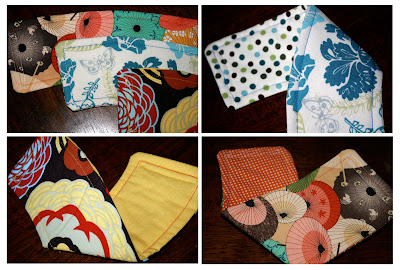
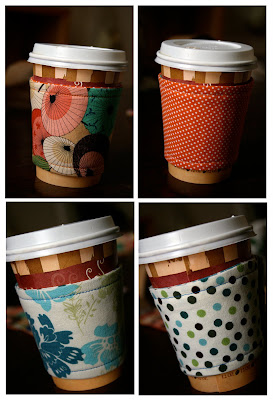
I just love these little coffee cozies and can’t wait to make more as gifts! With this project, I finally got to use and understand how batting works. I pre-washed all my new fabric that I bought the other day, however I didn’t wash the cozies after I made them, so I’m not yet sure how the batting will shrink if washed. I’ve also finally discovered the logistics to making things the right way so that all stitching and foldings are clean and neat. This takes A LOT of ironing work, btw.

Here are the coffee cozies… They are reversible with velcro attachment. I loved the yellow/red fabric one, but I made that one too small so I don’t have a pic of it around a cup.

On another note, my friend Dave bought me the domain name for my website and we are working on setting it up. So eventually I will move my blog to that site. I’ve also already registered my shop at Etsy so eventually if I want to sell, I’ve saved Sew Knot Kneaded on there, however I have found that sewing is extremely time consuming so I’m not sure I’ll be able to make very much once school starts. We shall see.

Shopping Organizer

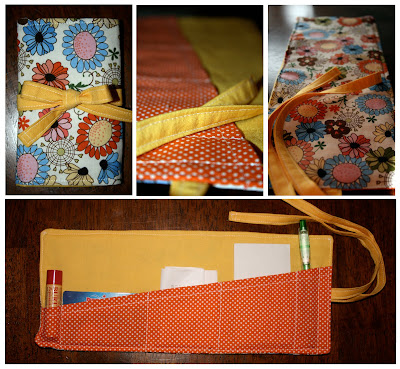
I got this idea from some of those rolled paintbrush holders, and I believe make-up brushes come in the same type of design. This little organizer is poorly made but has a good design element to it. I have since discovered the proper way to make many of these things that I made a few weeks ago, so as horrible as this is, it will get better, I promise.


Anyway, this can hold a chapstick (of course- we girls always need a chapstick with us), those store discount cards that just fatten your usual wallet, a small notebook, important receipts, coupons, and other little notes, and of course a few pens! It rolls closed, so you can still grab your pens (and chapstick!) without opening the whole thing.. and you can just toss it in your bag, and it takes up just as much room as a normal wallet.


I will eventually be perfecting this idea, making sure my stitching and basic design is clean and sturdy.


I have a few new projects I’ve made lately but were made as gifts so I will have to post once the gifts have been given!